Keep Employees Informed about COVID-19 with a Chatbot: Part 1

A chatbot can be a simple and easy way to answer your employees' questions—and we know they may have a lot right now. In this first post of our two part series, learn how you can get a chatbot up and running quickly with NativeChat.
Build your own bot Talk to an expert
Overview
With Progress NativeChat, our AI-powered chatbot, you don’t need to be a developer to create a chatbot capable of answering all questions your employees might have.
Give control of the chatbot’s knowledge base to your HR team, and enable them to keep the questions and answers up to date, with no delays.
We have prepared a sample COVID-19 chatbot, which comes with a predefined set of Questions and Answers, which you could change to match the needs of your company.
Like this one:
The Purpose
The purpose of this article is to provide you with guidance on how to use NativeChat with a COVID-19 Q&A project template.
This is a hands-on article, which will instruct you in a step-by-step fashion on how to build a COVID-19 chatbot.
As a result, you will learn:
- How to set up a new NativeChat account with a COVID-19 Sample Chatbot
- How to modify existing questions and answers
- How to use the chatbot to answer your questions
But more importantly, you will have a working chatbot that will be capable of answering various questions.
Set Up a NativeChat Account
If you are new to NativeChat, and you don't have an account with us yet, you should create a free account from the NativeChat registration page:
If you already have an account with NativeChat, head to bots.nativechat.com and log in.Create a New Project
Follow these steps to create the COVID-19 project:
- Select the Coronavirus FAQ Sample
- Give your chatbot a name: Coronavirus FAQ
- Press the Create bot button
Quick Test of the Project
On the right-hand side, there is a test window, which allows you to play with the chatbot.
Try asking it some questions like:
- "What is corona?"
- "Can I work from home?"
The chatbot should respond with an appropriate answer.
You can also say:
- "I have a travel question"
Reviewing Existing Questions and Answers
The chatbot comes with a predefined set of question and answers, which you can review at the Question Answering page.
Note: You can find the Question Answering page by going to dashboard then clicking on Question Answering.
At the Question Answering page, you should see a list of categories, each containing their own Q&As:
- Covid19QnA
- FinanceQnA
- MeetingsQnA
- TravelQnA
- WFHQnA
There is also a category called SmallTalk, which is a set of responses to expressions like: "Hi," "Thanks,""Bye." You can ignore it for now.
If you click on MeetingsQnA, you should see 3 items:
- Attending events
- Our events status
- In-person meetings
When you click on each of them, you will see that each has a number of questions. This is because usually there are many ways to ask for the same thing. By adding multiple questions, you make it easier for the chatbot to realize when to provide this answer to the user.
Additionally, each item contains a Group Name, which is a good way to give the general idea of what this question is about.
Finally, you have the answer, which is what the chatbot will say to the user, when they ask this question.
Hint: You can click on Question Answering to go back to the list of Q&A categories.
Managing Questions and Answers
Although the questions and answers that you get out of the box provide you with a good starting point, you need to update them to match your company's messaging.
Updating an Existing Q&A
Updating existing Q&As is really easy. You just pick one, change the values and press save.
Let's try to update the Our Events Status Q&A.
Step 1 — add two more triggering questions
Select Our Events Status item.
In here you will see four different ways to trigger this Q&A.
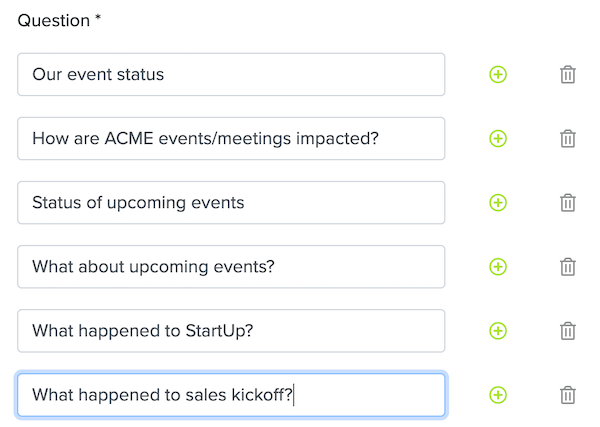
Click on the empty item and add the following text:
- What happened to StartUp?
Then press enter (or the green plus button) to add the item, and in the next empty item add this text:
- What happened to sales kickoff?
Your questions should look like this:
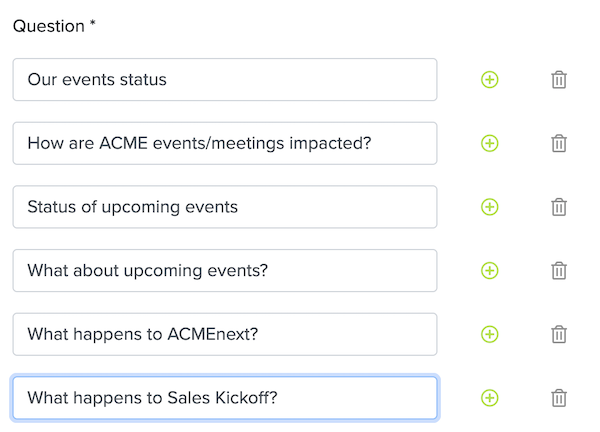
Finally, save the changes by pressing the Save changes button.
Step 2 — test the new questions
Now, you can test the changes by typing:
- What happened to sales kickoff?
- Status of StartUp
Your chatbot should respond with:

Note: The chatbot should be able to match to both of the above questions from the user, even if they don't match exactly to any of the provided triggering questions
Step 3 — update the answer
Next, you should update the answer to match it to your needs.
You can find the answer section below the list of questions. Just scroll down and you will see it there.
Change the text of the answer to:
- All upcoming live events are cancelled.</newline>If you have arranged travel plans, please contact the travel team to get that cancelled.
Save changes.
Note: You can use </newline> to split the answer in multiple speech bubbles.
You should use </newline> to break down your answers into more manageable chunks of information.
Step 4 — test the updated answer
Now, you can test the changes by saying:
- What is the status of the upcoming events?
Your chatbot should respond with:

Adding a New Q&A
Now that we know how to edit an existing Q&A item, it is time to add a new Q&A to instruct your employees about your video conferencing tools.
Step 1 — add a new Q&A
From the MeetingsQnA category, press the + Add a question button.
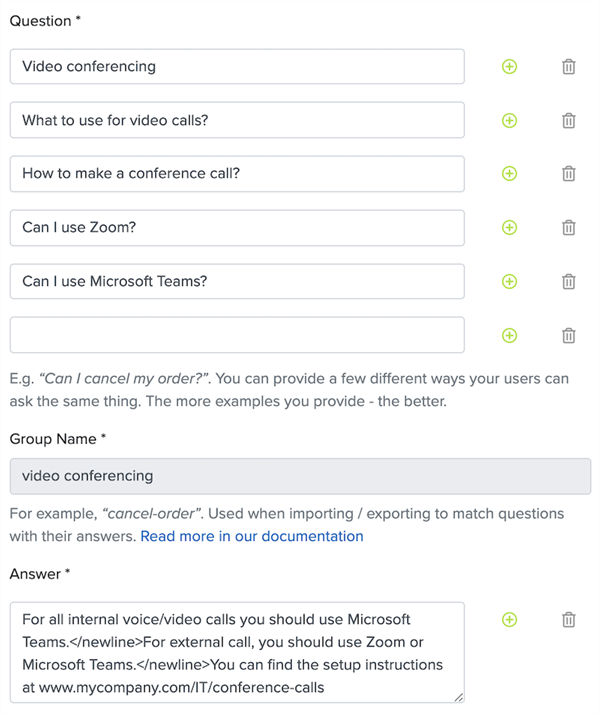
Add the following questions:
- Video conferencing
- What to use for video calls?
- How to make a conference call?
- Can I use Zoom?
- Can I use Microsoft Teams?
Note: It is best for the first question to be short and generic.
This is because when you ask the chatbot to give you a list of available question it uses the first entry for each Q&A to display the options.
Set the Group name:
- video conferencing
Set the following answer:
- For all internal voice/video calls you should use Microsoft Teams.</newline>For an external call, you should use Zoom or Microsoft Teams.</newline>You can find the setup instructions at www.mycompany.com/IT/conference-calls
Your new Q&A should look like this:
Finally, save the changes by pressing the Save changes button.
Step 2 — test the new Q&A
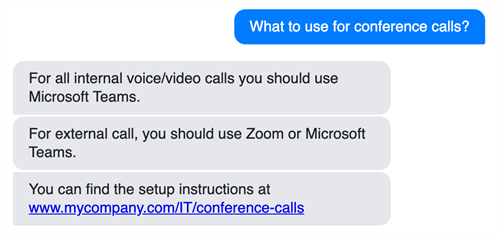
Now, you can test the new Q&A by saying:
- What to use for conference calls?
- Can I use zoom?
Your chatbot should respond with:
Removing a Q&A
You can easily remove any Q&A from the list. To do that just click on the trash can icon, and the whole Q&A will be gone.
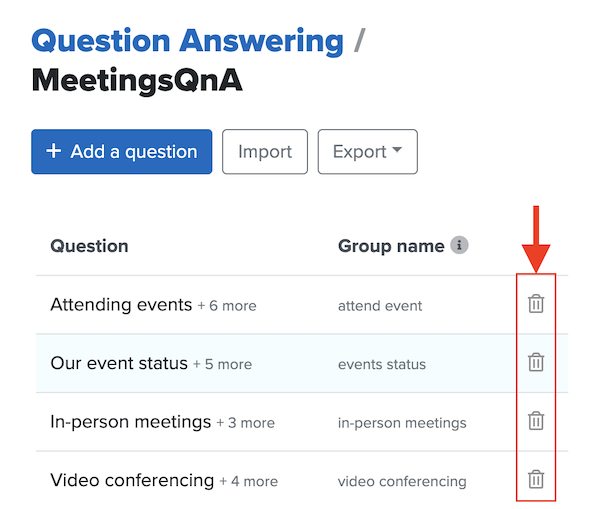
Note: There is no undo button, so if you delete a Q&A it will be gone forever.
Before you make any major changes, you can export the whole Q&A category to a csv file. Then if you want to go back to where you were, you can import it back.
Final Word
Congratulations! 🎉🥳
You have just created your first chatbot. I am sure this chatbot will be very useful to your employees, and over time you will add more questions and change some of the existing ones.
Part 2
If you are interested in taking your chatbot to the next level. There is a second part to this article.The next article teaches you:
- How to manage Q&A Categories—how to add add/remove them
- How to add/remove the list of possible questions when you say something like "I have a travel question"
Read the second part of this series
Publishing
In order to make this chatbot available to your employees, you will need to get it published in your internal website. For more on how to do that, here is our documentation on Publishing to Web.

Sebastian Witalec
Related Tags
Related Articles

Latest Stories in Your Inbox
Subscribe to get all the news, info and tutorials you need to build better business apps and sites